Showing posts with label frosting. Show all posts

Sunday, March 31, 2013

Numero Uno! Cake time.


This latest Cake creation is for a very special one year old. It's bright and fun & likely to put a smile on anyone's face. I do not have a cake recipe to share, because, quite frankly, Martha let me down. The cake was no bueno. So let's just pretend it was good cake and move on.


This was my third fondant creation, and though I still have a long way to go, I am slowly getting better at working with fondant.

The recipes for the frosting and the fondant are my trusty standbys. Here are the deets:

The Frosting

1 1/2 Cup Butter (3 sticks)
2 tsp Pure Vanilla Extract
1 tsp Pure Almond Extract
6 Cups Sifted Confectioner's Sugar (Must be Sifted!)
1/2 Cup Heavy Cream


The Frosting How To
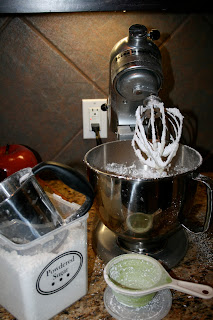
Whip it all together on medium high for 3ish minutes. I cream the butter and 1/2 the sugar, then add the other ingredients and remaining sugar.


The Fondant Deets
1 Bag Powdered Sugar (2lbs or about 7 cups)
1 Cup plain Shortening (don't use butter flavored or the fondant will be yellowish)
1 Cup Light Corn Syrup
1 tsp Pure Vanilla Extract
1 tsp Pure Almond Extract
1 tsp Salt
Gel Food Coloring (A lot of coloring!)

The Fondant How To
Mix until smooth and stiff. If the Fondant is sticky add more powdered sugar. To color separate into balls (depending on how many colors you want to make) Be sure to leave extra white - you will always need more white. To color use gel colors (liquid will not work) Coloring takes a long time, so you have to kneed, kneed, kneed. Once you get the desired colors roll it out on a powder sugar coated surface and decorate as desired. Remember Fondant will crack if it gets dry, so be sure to keep anything you aren't using within 15 minutes covered.

Not quite large enough
The Assembly 
Bake the cake of your choice, let cool
Crumb-coat (apply a thin layer of frosting on each cooled layer of cake) and stick in the fridge to "set"
Apply a layer of frosting over the crumb coat
Roll fondant into a thin circle large enough to cover your tier
Smooth fondant over tier
at this point I added stripes to the bottom layer and the circles/dots to the top layer
To stack the tiers, I put the top on a piece of cardboard so it could easily be removed for the "smash" cake.
For the topper I created this out of fondant, it is two sided with the babe's name on the other side and toothpick in the middle to hold it up, I set it on a smooshed up paper towel to dry overnight.

Here is the finished product

Happy Birthday sweet Babe!
Saturday, October 06, 2012

Cake Boss I am Not...Cake Decorating Part 2: Woodland Chocolate Cake

Adventures in Cake Decorating Take 2! My second attempt at a fondant cake, just so happened to be for my friend Jen, who was the recipient of my Rainbow Brite 30th Birthday Cake. I didn't even realize it until I was elbow deep in fondant again. This Cake's occasion was a woodland themed baby shower to celebrate the upcoming arrival of Jen's much anticipated little guy. The shower, which a few of us put together was adorable, my creative friend behind A Cherry on Top, is a decorating genius, so the cake really had to step it up! So without further adieu, I give you Cake, well cake you can have in a few hours after you follow the instructions below. 

  • The Cake Deets
  • 1 1/2 Cups all-purpose flour
  • 3/4 Cup unsweetened Dutch-process cocoa powder
  • 1 1/2 Cups granulated sugar
  • 1 1/2 tsp baking soda
  • 1 tsp baking powder
  • 1 tsp Salt
  • 2 large eggs
  • 3/4 Cup warm water
  • 3/4 Cup low-fat buttermilk
  • 3 tablespoons vegetable oil
  • 1 1/2 tsp pure vanilla extract
  • 1 tsp pure almond extract
  • *Note* to make the cake shown double the recipe.

  • The Cake How To
  • Preheat Oven to 350 degrees. Sift flour, cocoa, and sugar into a bowl, add other ingredients and mix on medium high for 2 or 3 minutes. Divide into cake pans and bake 8" pans for 20
  • minutes, 6" for 25 minutes, and 4" for 20 minutes. 

  • The Frosting
  • 1 1/2 Cup Butter (3 sticks)
    2 tsp Pure Vanilla Extract
    1 tsp Pure Almond Extract
    6 Cups Sifted Confectioner's Sugar (Must be Sifted!)
    1/2 Cup Heavy Cream

    The Frosting How To
    Whip it all together on medium high for 3ish minutes. I cream the butter and 1/2 the sugar, then add the other ingredients and remaining sugar - but I don't think the order matters in this one.

  • The Fondant Deets
  • 1 Bag Powdered Sugar (2lbs or about 7 cups)
  • 1 Cup plain Shortening (don't use butter flavored or the fondant will be yellowish)
  • 1 Cup Light Corn Syrup
  • 1 tsp Pure Vanilla Extract
    1 tsp Pure Almond Extract
    1 tsp Salt

  • The Fondant How To
  • Mix until smooth and stiff. If the Fondant is sticky add more powdered sugar. To color separate into balls (depending on how many colors you want to make) Be sure to leave extra white - you will always need more white. To color use gel colors (liquid will not work) Coloring takes a long time, since this is only my second attempt at fondant (see the first attempt here), I don't have any tools or many colors - so I did it the old fashioned middle school art class way, mix, mix, mix, but with fondant you have to kneed, kneed, kneed. Once you get the desired colors roll it out on a powder sugar coated surface and decorate as desired. Remember Fondant will crack if it gets dry, so be sure to keep anything you aren't using within 15 minutes covered.

  • The Assembly   
  • Once the cakes are cooled, slice them in half and fill with a layer of mousse, then put them back together. 
  • Next crumb coat each section, for example, here I stacked the two 8" cakes then crumb coated them,  then coated the 6" and 4" cakes.

  • Note - do not stack until you cover with fondant!

  • Next, (I am not good at this step, so please seek better advice!) roll your fondant in a circle large enough to cover each layer.  Drape the fondant over each layer and smooth it out. Once each section is coated, stack them. - to support the cake I used 4 small wooden skewers (after cutting off the pointed end), and inserted them through the top straight down for support.
  • Finally, the fun begins with decorating! Cut your shapes and place them on the cake - I dip my finger in water and run it over the back of the piece to help it stick. I tried a variety of cookie cutters to make the shapes, but for the most part I free handed the designs with my trusty cutco paring knife (I really should get some decorating tools!) 

  • Yes, I really did make this big of a mess in my kitchen!
    Cute little Owl
    Mr. Fox 

    The Front of the Cake
    The Back of the Cake
    Since I am far from skilled at this, the decorating took me about 5 hours from crumb-coating to finished product (not including baking time). It was a lot of work, and is far from Cake Boss Quality, but I don't think it's quite a Cake Wreck.

    P.S. Sorry about the weird formatting - not sure what happened here.

    Saturday, May 07, 2011

    Coconut Cake

    Happy Mother's Day to All the Mothers, Moms, Mommies, Mamas, Grandmothers, Grammas, Grannies, etc. 
    Last month My Mom and Gramma came to visit, so I made them an early Mother's Day Dinner. We had a delicious dinner of Grilled New York Strip Steak, Seared Sea Scallops, Roasted Vegetables, Quinoa and PopOvers. After a Celebratory Meal you Must have Dessert! My Mom Loves Coconut, so I made the following cake. Mom says it's a winner, so on with the Cake!
    *I apologize for the lack of step by step photos - too many backseat cooks in the kitchen*


    The Deets for the Cake
    3/4 Cup Butter (1 1/2 sticks)
    1 1/2 Cups Sugar
    3 Eggs
    1/2 tsp Pure Almond Extract
    3/4 Cup Coconut Milk
    1 3/4 Cups Flour Sifted (If you want a light & fluffy cake you must sift your flour!)
    2 tsp Baking Powder
    1/2 tsp Salt
    1 Cup Shredded Coconut


    The How To on the Cake
    Cream Butter & Sugar until light & fluffy
    Add Eggs & Almond Extract
    Beat until Smooth and Creamy
    Gradually add in Flour, Baking Powder, Salt and 1 Cup of Coconut
    Once Dry ingredients ar incorporated, Slowly add Coconut Milk
    Mix until Smooth


    Preheat Oven to 350 Degrees
    Grease and Butter 2 9inch round cake pans
    Divide Mixture between pans
    Bake for 30-35 minutes or until golden brown


    Frosting Deets
    1 1/4 Cup Sugar
    1/4 Cup Coconut Milk
    1/4 Cup Heavy Cream
    3 Egg Whites at room temperature
    1/2 tsp Cream of Tartar
    1 Cup Butter (2 sticks)
    1 tsp Pure Vanilla Extract
    1/2 tsp Pure Almond Extract


    Frosting How To
    Bring Sugar and Coconut Milk to a Boil
    In Mixer Wisk Eggs until foamy
    Slowly add in Cream and Cream of Tartar and Wisk until slightly stiff
    With mixer running, Slowly add Sugar Mixture (Slowly as to not scramble the Eggs)
    Add Butter and Vanilla & Almond Extracts and mix until Smooth


    Assembly Deets
    1 Cup Shredded Coconut - Toasted
    12 Strawberries thinly sliced


    Assembly How To
    Trim Cakes
    Spread 1/4 of the Frosting on bottom cake
    Layer strawberries and sprinkle 1/2 of toasted coconut
    Add top layer
    Frost Cake and top with remaining toasted coconut and strawberries
    Plate, Pray & Enjoy!

    Saturday, January 08, 2011

    Ace of Cakes I am Not...Adventures in Rainbow Cake

    This Week I decided to try my hand at cake decorating.  Now, I think I'm pretty good at making things taste good, but Martha Stewart I am not  & my buddy Chef Duff not a chance - I can make it tasty, but pretty not so much. So of course for my first attempt of making a pretty cake I had to go all out. 
    I started with this rainbow cake recipe from Martha Stewart (note do NOT try the frosting recipe it is awful! I ended up scraping it off the cake & tossing it).  I substituted Almond Extract for Vanilla in the cake, but other than that followed Martha's lead on the cake.  I used about 1 1/2 cups of batter for each layer & used 8 inch pans instead of 9 inch ones. The pans headed to the oven.
    For the Frosting I used my mother-in-law's amazing frosting, since Martha led me astray.  
    The Best Frosting Ever
    1 Cup Butter
    1 tsp Pure Vanilla Extract
    4 Cups Sifted Confectioner's Sugar (Must be Sifted!)
    2 TBS Milk

    After layering it was time for a trim & crumb coating
    Next it was time to try my hand at Fondant; not only had I never made the stuff, I'd never even used it before. My sister gave me the following recipe which she says is the best she's ever tried, it's found on allrecipes.com. My sister makes some pretty darn cute cakes, so I figured she'd know a good one. Amazingly the fondant actually tastes good! Again I subbed Almond for Vanilla, but other than that I didn't deviate. It was actually edible in comparison to most fondants I've tasted. 
    Here are my colors after what felt like hours of kneading and gallons of coloring. {Notes 1. You must use Gel Coloring, liquid will not work. 2. it's really hard to get "true" colors & it takes a lot of time & color}
    Finally it was time for the assembly, I have to admit I was a bit intimidated & had to text a good friend who makes beautiful cakes for some tips. {Thanks Heather!} After getting some tips I got to work. Once I got started it was pretty fun & by that time I was so tired I wasn't so hard on myself for the cracks and gaps...
     Jen's 30th Birthday Rainbow Brite Cake!
     I know it's far from perfect, but I have to say for a first attempt I was pretty happy with the results. 
    Besides, how can you not smile when you see this? It was so fun to see Jen's little girl's face when she cut into the cake & there was another rainbow! 

    I give the Rainbow Cake Recipe 5 stars. The Fondant 4 Stars (it still cracked a lot as you can see in the photos, but that's likely user error).  And my Mother-in-Law's frosting 5 Stars!  If you've got a lovely girl in your life whose 3 or 30 she'll love this cake.  Enjoy!

    Tuesday, November 02, 2010

    Sugar, Sugar... Cookies that is

    The Perfect Sugar Cookie is Hard to Come by
    I just so happen to have the Recipe...
    But I'm not quite sure I'm ready to share it...
    I am however willing to share this
    Frosting, Icing, Sugary Goodness
    The Best Frosting Recipe Ever!
    1 Cup Butter
    1 tsp Pure Vanilla Extract
    4 Cups Sifted Confectioner's Sugar (Must be Sifted!)
    2 TBS Milk
    COLOR!
    Enjoy your Perfect Frosting! 
    Maybe Someday I'll share the cookie recipe.  
    Someday, not today & tomorrow's not lookin' good either...but someday