Showing posts with label chocolate. Show all posts

Saturday, February 09, 2013

Gluten Free Chocolate Chip Cookies


As you know, I love cookies. Cookies are by far my favorite dessert. I love cookies so much that it saddens me when others, especially those I love, can't enjoy gooey-chocolatey-cookie-deliciousness. I first became familiar with Celiac disease 9 years ago when I met one of my now good friends who suffered from the disease (and I do mean suffered). I know there are many people who choose to live gluten free for whatever reason and if that's your choice, I hope you enjoy this recipe, but this recipe, is really for those who do not have a choice, those who become severely ill from contact with gluten. Celiac is no joke, so it struck a nerve yet again this weekend when one of my dearest friends revealed that she had been recently diagnosed and was going through the struggle of starting her gluten free life. She's a few months in and feeling much better, but although the gluten free options are much better than they were 9 years ago, they are still limited. After a quick chat I quickly sent her this recipe, which is a variation on my favorite chocolate chip cookie recipe. Since more and more people I know seem to be having gluten issues, I thought it was time to share this delicious recipe!

After experimenting with various flours, I personally prefer oat flour (ok I really prefer wheat, but you know what I mean). Feel free to try what you like - but I know this will satisfy gluten free and gluten-gluttons alike! So, without further adieu, gluten free chocolate chip cookies! 

The Deets
1/2 Cup Margarine or Shortening

3/4 Cup Butter (1 1/2 Sticks or 1 stick + 4 TBS)

1 Cup Sugar

1 Cup Brown Sugar

2 Eggs

2 tsp Pure Vanilla Extract

1/2 tsp Almond Extract

1 tsp baking Soda

1 tsp baking Powder

1 tsp Salt

3 Cups Oat Flour

3/4 Cup Oats

1 Bag Chocolate Chips

The How To
Cream Butter, Margarine, Sugar and Eggs
Add Vanilla and Almond Extract, Baking Soda, Baking Powder, Salt and 2 Cups of Oat Flour, Mix until smooth
Add Whole Oats and remaining Cup of Oat Flour and mix until smooth
Add Chocolate Chips and Mix until well incorporated
Roll into Balls for Baking
Bake at 350 for 8-10 minutes (I like my cookies gooey!)
Enjoy the gluten free goodness! Now if I could only find a way to make them calorie free...

Saturday, October 06, 2012

Cake Boss I am Not...Cake Decorating Part 2: Woodland Chocolate Cake

Adventures in Cake Decorating Take 2! My second attempt at a fondant cake, just so happened to be for my friend Jen, who was the recipient of my Rainbow Brite 30th Birthday Cake. I didn't even realize it until I was elbow deep in fondant again. This Cake's occasion was a woodland themed baby shower to celebrate the upcoming arrival of Jen's much anticipated little guy. The shower, which a few of us put together was adorable, my creative friend behind A Cherry on Top, is a decorating genius, so the cake really had to step it up! So without further adieu, I give you Cake, well cake you can have in a few hours after you follow the instructions below. 

  • The Cake Deets
  • 1 1/2 Cups all-purpose flour
  • 3/4 Cup unsweetened Dutch-process cocoa powder
  • 1 1/2 Cups granulated sugar
  • 1 1/2 tsp baking soda
  • 1 tsp baking powder
  • 1 tsp Salt
  • 2 large eggs
  • 3/4 Cup warm water
  • 3/4 Cup low-fat buttermilk
  • 3 tablespoons vegetable oil
  • 1 1/2 tsp pure vanilla extract
  • 1 tsp pure almond extract
  • *Note* to make the cake shown double the recipe.

  • The Cake How To
  • Preheat Oven to 350 degrees. Sift flour, cocoa, and sugar into a bowl, add other ingredients and mix on medium high for 2 or 3 minutes. Divide into cake pans and bake 8" pans for 20
  • minutes, 6" for 25 minutes, and 4" for 20 minutes. 

  • The Frosting
  • 1 1/2 Cup Butter (3 sticks)
    2 tsp Pure Vanilla Extract
    1 tsp Pure Almond Extract
    6 Cups Sifted Confectioner's Sugar (Must be Sifted!)
    1/2 Cup Heavy Cream

    The Frosting How To
    Whip it all together on medium high for 3ish minutes. I cream the butter and 1/2 the sugar, then add the other ingredients and remaining sugar - but I don't think the order matters in this one.

  • The Fondant Deets
  • 1 Bag Powdered Sugar (2lbs or about 7 cups)
  • 1 Cup plain Shortening (don't use butter flavored or the fondant will be yellowish)
  • 1 Cup Light Corn Syrup
  • 1 tsp Pure Vanilla Extract
    1 tsp Pure Almond Extract
    1 tsp Salt

  • The Fondant How To
  • Mix until smooth and stiff. If the Fondant is sticky add more powdered sugar. To color separate into balls (depending on how many colors you want to make) Be sure to leave extra white - you will always need more white. To color use gel colors (liquid will not work) Coloring takes a long time, since this is only my second attempt at fondant (see the first attempt here), I don't have any tools or many colors - so I did it the old fashioned middle school art class way, mix, mix, mix, but with fondant you have to kneed, kneed, kneed. Once you get the desired colors roll it out on a powder sugar coated surface and decorate as desired. Remember Fondant will crack if it gets dry, so be sure to keep anything you aren't using within 15 minutes covered.

  • The Assembly   
  • Once the cakes are cooled, slice them in half and fill with a layer of mousse, then put them back together. 
  • Next crumb coat each section, for example, here I stacked the two 8" cakes then crumb coated them,  then coated the 6" and 4" cakes.

  • Note - do not stack until you cover with fondant!

  • Next, (I am not good at this step, so please seek better advice!) roll your fondant in a circle large enough to cover each layer.  Drape the fondant over each layer and smooth it out. Once each section is coated, stack them. - to support the cake I used 4 small wooden skewers (after cutting off the pointed end), and inserted them through the top straight down for support.
  • Finally, the fun begins with decorating! Cut your shapes and place them on the cake - I dip my finger in water and run it over the back of the piece to help it stick. I tried a variety of cookie cutters to make the shapes, but for the most part I free handed the designs with my trusty cutco paring knife (I really should get some decorating tools!) 

  • Yes, I really did make this big of a mess in my kitchen!
    Cute little Owl
    Mr. Fox 

    The Front of the Cake
    The Back of the Cake
    Since I am far from skilled at this, the decorating took me about 5 hours from crumb-coating to finished product (not including baking time). It was a lot of work, and is far from Cake Boss Quality, but I don't think it's quite a Cake Wreck.

    P.S. Sorry about the weird formatting - not sure what happened here.

    Sunday, August 26, 2012

    Chocolate Chip Cookies!

    Cookie, Cookie, Cookie Please. Of all the Sweets in the World the humble Cookie is my favorite.  And King of the Cookie? The Classic Chocolate Chip of Course!
    The Chocolate Chip Cookie comes in many varieties and I personally have about 3 Classic CCC recipes that I love. Here is today's CCC Recipe based on the recipe in the Old 1960's Orange Betty Crocker Cookbook.

    The Deets
    1/2 Cup Margarine or Shortening
    3/4 Cup Butter (1 1/2 Sticks or 1 stick + 4 TBS)
    1 Cup Sugar
    1 Cup Brown Sugar
    2 Eggs
    2 tsp Pure Vanilla Extract
    1/2 tsp Almond Extract
    1 tsp baking Soda
    1 tsp baking Powder
    1 tsp Salt
    2 Cups Flour
    1 1/4 Cup Whole Wheat Flour
    1 Bag Chocolate Chips

    The How To
    Cream Butter, Margarine and Sugar
    Add Eggs and Mix until smooth
    Add Vanilla, Baking Soda, Baking Powder, Salt and 1 Cup of Flour, Mix until dry ingredients are incorporated, add remaining Cup of Flour, Mix until smooth.
    Add Whole Wheat Flour and mix until smooth
    Add Chocolate Chips and mix one last time
    Bake at 350 for 10-12 Minutes
    Pure Cookie Perfection!

    Saturday, February 11, 2012

    Chocolate Covered Pretzels

    Looking for a sweet treat for your sweetheart? Chocolate Covered Pretzels coming up! I remember one year for my birthday my Aunt sent me a beautiful box of decorated chocolate covered pretzel rods. I felt so grown up and fancy. I still love them and love making different toppings for them, but now they make me feel like a kid! Funny how things change.

    Chocolate covered pretzels are simple to make, fun to decorate and great to gift! Here are the simple deets on chocolate covered bliss!
    The Deets
    1 bag of pretzel rods (for this I like classic rold gold) {Makes about 2 dozen pretzels}
    1 1/2 Cup Chocolate (Semi-Sweet)
    1TBS shortening or butter
    1 Cup White Chocolate or Almond Bark (if you use almond bark you don't need to add butter or shortening - if you use chocolate add a TBS)
    Sprinkles!
    Almonds!
    Toasted Coconut
    Any topping your heart desires
    Parchment paper for drying

    The How To
    First Regular Chocolate!
    In a BPA free plastic container mix Chocolate Chips and Shortening and melt in the microwave stirring every 30 - 45 seconds (should take about 2 1/2 - 3 minutes) {do not use glass - it gets too hot and can over cook the chocolate)
    Lay out parchment paper
    I've discovered that drizzling the chocolate over the pretzel works better than trying to dip.
    Put Pretzel rod standing up in melted chocolate with spoon or spatula pour chocolate over pretzel rod
    gently shake rod (like ringing a bell) back and forth to remove excess chocolate
    For topping you can do it one of two ways:
    1. Hold pretzel up and sprinkle toppings all around or
    2. make a line of topping on parchment paper, lay pretzel on it and then sprinkle on more toppings.

    Repeat with white chocolate.

    Let Pretzels dry and then enjoy!

    Happy Valentines Day!

    Saturday, December 10, 2011

    Mint Meltaway Cookies - 2 Ways

    Merry Christmas Season! Let the Holiday Baking Begin! Today's Christmas Cookie Delight is a new recipe I tried based on a recipe I saw on pintrest {did I mention I love pintrest?}. The original recipe is found here. As you know, or should know by now, I have a hard time leaving things alone... this recipe was no different. Here's my take on Mint Meltaway Cookies
    The Deets
    1 Cup Butter (2 sticks)
    1 1/4 Cup Powdered Sugar
    3 tsp Pure Mint Extract or Oil
    3 tsp Pure Vanilla Extract
    2 1/2 Cups Flour
    Food Coloring
    Hershey's Kisses (Plain or Mint Truffle)
    Powdered Sugar


    The How To
    Preheat Oven to 375
    Cream Butter, Sugar, Mint and Vanilla
    Add Flour and Food Coloring
    Mix Until Smooth


    Option 1
    Roll Dough into small balls and place on cookie sheet
    Dust with Powdered Sugar once they come out of the oven

    Option 2
    Roll Dough into small balls and push a Kiss into the Center
    Either way Bake at 375 for 8-10 minutes
    My favorites are the ones with the Mint Truffle Kisses!
    Enjoy your minty deliciousness!

    Sunday, October 23, 2011

    Fall into Fall: Chocolate Chip Pumpkin Cookies

    Fall = Pumpkin. I'm a big fan of pumpkin in the fall, pumpkin cookies, pumpkin bread, pumpkin muffins, pumpkin seeds. There are only two ways (I know of) that I don't like pumpkin: pumpkin pie (I know, I know, it's a classic - but I can't do it - in fact, I don't like pie at all) and pumpkin soup (sorry mom). Anyway back to the good pumpkin! Today we are whipping up some pumpkin chocolate chip cookies! This recipe is quick easy and yields about 5 dozen fluffy pumpkin chocolate chip cookies. Yummy.


    The Deets
    1 Cup Butter (2 sticks) 
    1/2 Cup Sugar
    1/2 Cup Brown Sugar
    2 Eggs
    1 Can Pumpkin Puree
    1 tsp Pure Vanilla Extract
    3 Cups Flour (I use 2 Cups Regular, 1 Cup Wheat)
    2 tsp Baking Soda
    1 tsp Salt
    1 tsp Cinnamon 
    1 tsp Nutmeg 
    1 Bag Chocolate Chips (Milk)


    The How To
    Cream Butter, Sugars and Eggs
    Add Vanilla and Pumpkin
    Add Flour, Baking Soda, Salt, Cinnamon and Nutmeg
    Beat until Smooth
    Add Chocolate Chips
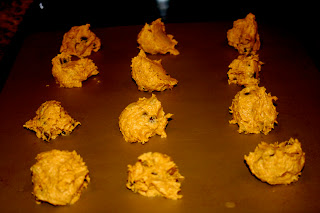
    Scoop onto cookie sheets (spray sheets with Pam first)
    Bake at 350 degrees for 10 - 15 minutes (may take 20 minutes depending on oven)
    Enjoy a cookie or two along with your beautiful fall weather!

    Sunday, February 13, 2011

    A Sweet Treat for Your Sweet Heart: Chocolate Covered Cherry Cookies

    Happy Valentines Day! 
    Today I'm Sharing a Sweet Treat for Your Sweetie
    When I think of Valentines Day treats I think Chocolate & Cherries {But I don't like real chocolate covered cherries - weird right}
    I Love this Cherry Chocolate Hot Chocolate 

    But My Favorite Chocolate Cherry Treat is Chocolate Covered Cherry Cookies. My mom used to make them for us every year & we couldn't wait to get our hands on them!
    The Cookie Deets
    1 1/4 Cup Flour
    1/2 Cocoa Powder
    1 Cup Sugar
    1/2 Cup Butter
    1 Egg
    1 1/2 tsp Vanilla
    1/4 tsp Baking Soda
    1/4 tsp Baking Powder
    1/4 tsp Salt
    Maraschino Cherries (set aside for construction) 
    The How To
    Mix all ingredients - except the Cherries
    The Dough will be slightly crumbly
    The Filling/Sauce Deets
    6 oz Chocolate
    1/2 Cup Sweet Condensed Milk
    4 Tablespoons Cherry Juice
    The How To
    Mix all ingredients & Melt until smooth 
    (about 1 minute in the microwave)
    Construction
    Roll Dough into Ball, then Poke a hole in the ball & work the hole until it is large enough to fit a cherry & chocolate sauce. 
    Add Cherry
    Fill with Chocolate Sauce
    Bake at 350 for 10 Minutes & Enjoy!
    Happy Valentines Day to you & yours!

    Saturday, November 27, 2010

    THE Dessert: Chocolate Truffle Cake

    This Recipe is for the Best Dessert Ever
    It is an extra special occasion only recipe
    It is so good that when my sister was having her first baby, she said I couldn't come see my new nephew without it.  Yes it is that good.  So good that you will do irrational things like keep your sister away from your baby until a Chocolate Truffle Cake is Delivered.
    Without Further Ado, I present 


    Tiffany's Truffle Cake
    The Deets
    2 sticks Butter (1 Cup)
    6 oz Unsweetened Chocolate
    6 oz Semisweet Chocolate
    5 Eggs
    1 Cup Sugar
    1 1/2 tsp Vanilla Extract
    1/2 tsp Almond Extract
    1/3 Cup Corn Syrup (I mean liquid Corn Sugar)


    Prep
    Line the bottom of a 9 inch spring-form pan with parchment paper
    Preheat oven to 350 Degrees


    The Instructions  
    DO NOT DEVIATE! 
    Melt Butter & Chocolate together & let cool
    Once cool add Eggs, 1/2 Cup Sugar, Vanilla & Almond Extract
    Whip to Triple Volume
    Separately Mix remaining 1/2 Cup Sugar & Corn Syrup and bring to a Boil
    Add boiling mixture to Chocolate Mixture
    Mix until Smooth
    Pour mixture into a spring-form pan 
    Place spring-form into larger pan & fill larger pan with 1 inch of water
    Bake at 350 for 40 minutes.
    Garnish as Desired (this is supposed to be a maple leaf to celebrate fall)
    WARNING! This is a very rich dessert, the cut made in the above photo was 4 servings

    I have been making this Truffle Cake for years & I didn't think it could get better, but then my friend Jen brought her butterscotch over to go with another dessert and I accidently got some on my truffle cake - let me just say amazingly good, rich chocolate with slightly savory butterscotch - delish!  But use the butterscotch sparingly to avoid a sugar coma. 

    Jen's Butterscotch Recipe

     1/4 cup Butter
    1/2 cup packed Brown Sugar
    1/2 cup Heavy Cream
    1/2 teaspoon Kosher Salt
    1 1/2 teaspoons Vanilla Extract
    Melt butter in a medium heavy-bottomed saucepan over medium heat. Add the sugar, cream and salt and whisk until well blended.  Bring to a very gentle boil and cook for about five minutes, whisking occasionally.
    Remove from heat and add one teaspoon of the vanilla extract whisk until combined.
    Let cool slightly.
    Drizzle over your favorite dessert.

    Enjoy these two recipes separately or in collaboration for a dessert you won't soon forget.