Thursday, May 09, 2013

Solid Gold

Ok, so it's actually Liquid Gold, but Solid Gold sounds so much cooler!
Today's Juice Creation is all about the Gold
Golden Beet
Golden Pineapple
Golden-ish Apples
Goldi-Peel Lemon
It's beautiful, delicious and of course healthy.

The Deets
1 Golden Beet - washed and peeled
2 Cups Pineapple - I use the core which is usually about a cup + a cup of sweet juicy fruit
3 Apples
1 Lemon - peeled (I always add a lemon to beet juice to keep it crisp)

The How To
Wash all your fruits & veggies
Always peel your beets or your juice will taste dirty - literally, it will taste like dirt.
Always peel citrus fruit or your juice will taste bitter
Cut into pieces that will fit in your juicer and juice away.

Enjoy your Golden Nutrients!

Sunday, April 28, 2013

Chicken Tortilla Soup


I know what you're thinking, "Soup?, but it's spring". Yes, I know it is spring, beautiful sunny days mixed with cold rainy days. And those rainy days, they call for soup. The following recipe is adapted from the culinary genius, Pioneer Woman
The Deets
1 Rotisserie Chicken or 2 Boneless, Skinless Chicken Breasts
1 TB Olive Oil             
1 tsp Chili Powder
1/2 tsp Garlic Powder
1 tsp Taco Seasoning
1/2 tsp Salt
1/2 Onion Diced
3 Cloves Garlic, Minced
1 Can Rotel Tomatoes And Green Chilies
4 Cups (32 ounces) Chicken Broth
1 small can of Tomato Paste
4 cups Hot Water
1 can of Black Beans, Rinsed and Drained
3 Tablespoons Cornmeal (mixed with 1/4 cup of water and made into a paste)

For the Toppings
1/2 Avocado for each person
Shredded Cheese
Sour Cream
Green Onion, Onion, and/or Cilantro 
5 whole Corn Tortillas, Cut Into Uniform Strips Around 2 To 3 Inches or 1 bag of Frito Corn Chips

The How To
Cook Chicken or Pick up a Rotisserie Chicken; 
Cool and Shred/Chop Chicken; Set aside
Add Olive Oil to Large Stock Pot
Add Onion and Garlic, Cook until clear
Add Seasoning, Rotel, and Tomato Paste, Stir until seasoning is well distributed
Add Water and Chicken Broth
Bring to a Boil and cook for 45 minutes
Add Black Beans and Cornmeal paste
Add Chicken
Simmer for 15 minutes to let reduce further
Turn off heat and let sit for another 10-15 minutes

Spoon up, Top, and Enjoy!

Sunday, March 31, 2013

Numero Uno! Cake time.


This latest Cake creation is for a very special one year old. It's bright and fun & likely to put a smile on anyone's face. I do not have a cake recipe to share, because, quite frankly, Martha let me down. The cake was no bueno. So let's just pretend it was good cake and move on.


This was my third fondant creation, and though I still have a long way to go, I am slowly getting better at working with fondant.

The recipes for the frosting and the fondant are my trusty standbys. Here are the deets:

The Frosting

1 1/2 Cup Butter (3 sticks)
2 tsp Pure Vanilla Extract
1 tsp Pure Almond Extract
6 Cups Sifted Confectioner's Sugar (Must be Sifted!)
1/2 Cup Heavy Cream


The Frosting How To
Whip it all together on medium high for 3ish minutes. I cream the butter and 1/2 the sugar, then add the other ingredients and remaining sugar.


The Fondant Deets
1 Bag Powdered Sugar (2lbs or about 7 cups)
1 Cup plain Shortening (don't use butter flavored or the fondant will be yellowish)
1 Cup Light Corn Syrup
1 tsp Pure Vanilla Extract
1 tsp Pure Almond Extract
1 tsp Salt
Gel Food Coloring (A lot of coloring!)

The Fondant How To
Mix until smooth and stiff. If the Fondant is sticky add more powdered sugar. To color separate into balls (depending on how many colors you want to make) Be sure to leave extra white - you will always need more white. To color use gel colors (liquid will not work) Coloring takes a long time, so you have to kneed, kneed, kneed. Once you get the desired colors roll it out on a powder sugar coated surface and decorate as desired. Remember Fondant will crack if it gets dry, so be sure to keep anything you aren't using within 15 minutes covered.

Not quite large enough
The Assembly 
Bake the cake of your choice, let cool
Crumb-coat (apply a thin layer of frosting on each cooled layer of cake) and stick in the fridge to "set"
Apply a layer of frosting over the crumb coat
Roll fondant into a thin circle large enough to cover your tier
Smooth fondant over tier
at this point I added stripes to the bottom layer and the circles/dots to the top layer
To stack the tiers, I put the top on a piece of cardboard so it could easily be removed for the "smash" cake.
For the topper I created this out of fondant, it is two sided with the babe's name on the other side and toothpick in the middle to hold it up, I set it on a smooshed up paper towel to dry overnight.

Here is the finished product

Happy Birthday sweet Babe!

Saturday, February 09, 2013

Gluten Free Chocolate Chip Cookies


As you know, I love cookies. Cookies are by far my favorite dessert. I love cookies so much that it saddens me when others, especially those I love, can't enjoy gooey-chocolatey-cookie-deliciousness. I first became familiar with Celiac disease 9 years ago when I met one of my now good friends who suffered from the disease (and I do mean suffered). I know there are many people who choose to live gluten free for whatever reason and if that's your choice, I hope you enjoy this recipe, but this recipe, is really for those who do not have a choice, those who become severely ill from contact with gluten. Celiac is no joke, so it struck a nerve yet again this weekend when one of my dearest friends revealed that she had been recently diagnosed and was going through the struggle of starting her gluten free life. She's a few months in and feeling much better, but although the gluten free options are much better than they were 9 years ago, they are still limited. After a quick chat I quickly sent her this recipe, which is a variation on my favorite chocolate chip cookie recipe. Since more and more people I know seem to be having gluten issues, I thought it was time to share this delicious recipe!

After experimenting with various flours, I personally prefer oat flour (ok I really prefer wheat, but you know what I mean). Feel free to try what you like - but I know this will satisfy gluten free and gluten-gluttons alike! So, without further adieu, gluten free chocolate chip cookies! 

The Deets
1/2 Cup Margarine or Shortening

3/4 Cup Butter (1 1/2 Sticks or 1 stick + 4 TBS)

1 Cup Sugar

1 Cup Brown Sugar

2 Eggs

2 tsp Pure Vanilla Extract

1/2 tsp Almond Extract

1 tsp baking Soda

1 tsp baking Powder

1 tsp Salt

3 Cups Oat Flour

3/4 Cup Oats

1 Bag Chocolate Chips

The How To
Cream Butter, Margarine, Sugar and Eggs
Add Vanilla and Almond Extract, Baking Soda, Baking Powder, Salt and 2 Cups of Oat Flour, Mix until smooth
Add Whole Oats and remaining Cup of Oat Flour and mix until smooth
Add Chocolate Chips and Mix until well incorporated
Roll into Balls for Baking
Bake at 350 for 8-10 minutes (I like my cookies gooey!)
Enjoy the gluten free goodness! Now if I could only find a way to make them calorie free...

Saturday, January 26, 2013

Red PrimeSteak OKC

It's been a while since I've done a resaurant review, partially because "everyone" seems to take photos of every meal they eat and I am not "everyone" and had thus stopped doing so, and lets face it, a food blog without the visual just isn't as good. That being said, I had the most amazing meal last night! So good that photos or no photos it demanded attention. Lucky for you, the resaurant website had photos of most of the deliciousness!

This week we had a Celebratory Dinner at Red PrimSteak in Oklahoma City. Red is a well known for their amazing Prime meats, wine list and of course their red neon lights. The service is great and the food is even better. Here's the rundown on the delicious dishes.

RP Tomato Salad
This salad is a perfect Caprese Salad +; the + being fried green tomatoes. The mozzarella was perfect, milky and fresh; balsamic redux and basil infused evoo hit all the right notes. And the fried green tomatoes? Amazing! I make pretty amazing fried green tomatoes, but these, oh my goodness, mouthwatering deliciousness!  The RP's Tomato Salad was the Perfect Start to the evening.
The RP Tomato Salad earns 5 of 5 stars


Prime Sirloin
Normally I'm a Ribeye girl, but I was sold on the 10 oz Prime Sirloin, and it was superb. At Red Prime, each steak comes with your choice of Rub and Sauce. I chose the Blue Cheese Rub with Red's Custom Steak Sauce. Now, we are taking about Prime meat here, so you know it's going to be good, but this steak, oh this steak, was melt-in-your-mouth, i-can't-wait-for-my-next-bite amazing. It was tender, perfectly aged, seasoned and cooked to my preferred medium-rare +. When it comes to steak I'm normally a purest, no sauce, basic rub - but since these are part of the allure of prime, I had to try them. The blue cheese was bold and flavorful, the Red steak sauce was bold and deep. It was a perfect medley of flavors.
The Prime Sirloin earns 5 of 5 stars

Green Chile Mac
I've said it before and I'll say it again, I love a good Mac and Cheese. Red Prime did not disapoint. The Green Chile Mac was rich and creamy, with a kick. A bit too much of a kick  for me, but the overall flavor was amazing.
The Green Chile Mac earns 4 of 5 stars.

Chocolate Spoon Cake
To top off the night we had the chocolate spoon cake, a rich nutty, slightly gooey chocolate cake topped with vanilla ice cream and served with salted carmel sauce and poached cherries. The cake was sweet and rich without being too rich, the carmel sauce was divine - the perfect blend of sweet-salty goodness. The ice cream was standard, nothing to write home about, but it completed the dish. The cherries fell flat; they were bland and the texture was off.
The Chocolate Spoon Cake earns 4 of 5 stars

Red PrimeSteak is a must eat. The food is divine and the service is outstanding. Overall Red PrimeSteak earns a 4.5 of 5 stars.

*Photo Credit http://redprimesteak.com/
Wednesday, December 12, 2012

Pink Peppermint Ice Cream

Tis the Season for Candy Canes, Mint Truffles, peppermint cocoa, and all things Red, White and Minty! I decided some peppermint ice cream needed to join the party. So, without further adieu, I give you Peppermint Ice Cream.

The Deets
2 Cups Half & Half (or milk)
2 Cups Heavy Cream (hey! it's Christmas no skimping on the good stuff)
6 Egg Yokes
1 1/2 Cups of Sugar
1 1/2 tsp Pure Vanilla Extract
1 tsp Pure Peppermint Extract
1/2 Cup crushed Candy Cane or Starmints
Pink or Red food coloring - optional

The How To
In a medium sauce pan heat half & half and cream over medium low
In a separate bowl or in the mixer whisk egg yokes and sugar until they are a fluffy, smooth creamy yellow
Once smooth, slowly add cream mixture 1/4 cup at a time (this tempers the eggs and keeps them from scrambling)
Continue mixing/whisking on low/slow as you add the cream mixture
Once the egg and cream mixtures have been combined, Return to heat
Add Vanilla and Peppermint Extracts
Add food coloring and mix well
Bring mixture to 170 degrees.
Once you've hit the magic safe 170 degrees, remove from heat and refrigerate for 4-6 hours (I usually leave mine over night)

Prepare in Ice Cream machine according to your machine's "cooking" time - mine takes about 20 minutes.
When the ice cream is almost finished add your crushed candy canes
Place in an air tight container for 2-3 hours to firm up.
Scoop & Enjoy!

Saturday, October 06, 2012

Cake Boss I am Not...Cake Decorating Part 2: Woodland Chocolate Cake

Adventures in Cake Decorating Take 2! My second attempt at a fondant cake, just so happened to be for my friend Jen, who was the recipient of my Rainbow Brite 30th Birthday Cake. I didn't even realize it until I was elbow deep in fondant again. This Cake's occasion was a woodland themed baby shower to celebrate the upcoming arrival of Jen's much anticipated little guy. The shower, which a few of us put together was adorable, my creative friend behind A Cherry on Top, is a decorating genius, so the cake really had to step it up! So without further adieu, I give you Cake, well cake you can have in a few hours after you follow the instructions below. 

  • The Cake Deets
  • 1 1/2 Cups all-purpose flour
  • 3/4 Cup unsweetened Dutch-process cocoa powder
  • 1 1/2 Cups granulated sugar
  • 1 1/2 tsp baking soda
  • 1 tsp baking powder
  • 1 tsp Salt
  • 2 large eggs
  • 3/4 Cup warm water
  • 3/4 Cup low-fat buttermilk
  • 3 tablespoons vegetable oil
  • 1 1/2 tsp pure vanilla extract
  • 1 tsp pure almond extract
  • *Note* to make the cake shown double the recipe.

  • The Cake How To
  • Preheat Oven to 350 degrees. Sift flour, cocoa, and sugar into a bowl, add other ingredients and mix on medium high for 2 or 3 minutes. Divide into cake pans and bake 8" pans for 20
  • minutes, 6" for 25 minutes, and 4" for 20 minutes. 

  • The Frosting
  • 1 1/2 Cup Butter (3 sticks)
    2 tsp Pure Vanilla Extract
    1 tsp Pure Almond Extract
    6 Cups Sifted Confectioner's Sugar (Must be Sifted!)
    1/2 Cup Heavy Cream

    The Frosting How To
    Whip it all together on medium high for 3ish minutes. I cream the butter and 1/2 the sugar, then add the other ingredients and remaining sugar - but I don't think the order matters in this one.

  • The Fondant Deets
  • 1 Bag Powdered Sugar (2lbs or about 7 cups)
  • 1 Cup plain Shortening (don't use butter flavored or the fondant will be yellowish)
  • 1 Cup Light Corn Syrup
  • 1 tsp Pure Vanilla Extract
    1 tsp Pure Almond Extract
    1 tsp Salt

  • The Fondant How To
  • Mix until smooth and stiff. If the Fondant is sticky add more powdered sugar. To color separate into balls (depending on how many colors you want to make) Be sure to leave extra white - you will always need more white. To color use gel colors (liquid will not work) Coloring takes a long time, since this is only my second attempt at fondant (see the first attempt here), I don't have any tools or many colors - so I did it the old fashioned middle school art class way, mix, mix, mix, but with fondant you have to kneed, kneed, kneed. Once you get the desired colors roll it out on a powder sugar coated surface and decorate as desired. Remember Fondant will crack if it gets dry, so be sure to keep anything you aren't using within 15 minutes covered.

  • The Assembly   
  • Once the cakes are cooled, slice them in half and fill with a layer of mousse, then put them back together. 
  • Next crumb coat each section, for example, here I stacked the two 8" cakes then crumb coated them,  then coated the 6" and 4" cakes.

  • Note - do not stack until you cover with fondant!

  • Next, (I am not good at this step, so please seek better advice!) roll your fondant in a circle large enough to cover each layer.  Drape the fondant over each layer and smooth it out. Once each section is coated, stack them. - to support the cake I used 4 small wooden skewers (after cutting off the pointed end), and inserted them through the top straight down for support.
  • Finally, the fun begins with decorating! Cut your shapes and place them on the cake - I dip my finger in water and run it over the back of the piece to help it stick. I tried a variety of cookie cutters to make the shapes, but for the most part I free handed the designs with my trusty cutco paring knife (I really should get some decorating tools!) 

  • Yes, I really did make this big of a mess in my kitchen!
    Cute little Owl
    Mr. Fox 

    The Front of the Cake
    The Back of the Cake
    Since I am far from skilled at this, the decorating took me about 5 hours from crumb-coating to finished product (not including baking time). It was a lot of work, and is far from Cake Boss Quality, but I don't think it's quite a Cake Wreck.

    P.S. Sorry about the weird formatting - not sure what happened here.

    Tuesday, September 25, 2012

    Crab Catcher

    Crab Catcher La Jolla CA
    One word: Delicious
    Scallops with Lobster Risotto 

    Halibut with Potato Plantain Mash
    Amazing Food, Fantastic View, It's a Must Eat in La Jolla California

    Sunday, August 26, 2012

    Chocolate Chip Cookies!

    Cookie, Cookie, Cookie Please. Of all the Sweets in the World the humble Cookie is my favorite.  And King of the Cookie? The Classic Chocolate Chip of Course!
    The Chocolate Chip Cookie comes in many varieties and I personally have about 3 Classic CCC recipes that I love. Here is today's CCC Recipe based on the recipe in the Old 1960's Orange Betty Crocker Cookbook.

    The Deets
    1/2 Cup Margarine or Shortening
    3/4 Cup Butter (1 1/2 Sticks or 1 stick + 4 TBS)
    1 Cup Sugar
    1 Cup Brown Sugar
    2 Eggs
    2 tsp Pure Vanilla Extract
    1/2 tsp Almond Extract
    1 tsp baking Soda
    1 tsp baking Powder
    1 tsp Salt
    2 Cups Flour
    1 1/4 Cup Whole Wheat Flour
    1 Bag Chocolate Chips

    The How To
    Cream Butter, Margarine and Sugar
    Add Eggs and Mix until smooth
    Add Vanilla, Baking Soda, Baking Powder, Salt and 1 Cup of Flour, Mix until dry ingredients are incorporated, add remaining Cup of Flour, Mix until smooth.
    Add Whole Wheat Flour and mix until smooth
    Add Chocolate Chips and mix one last time
    Bake at 350 for 10-12 Minutes
    Pure Cookie Perfection!

    Saturday, August 11, 2012

    Blackberry Banana Smoothie

    It's a Very Berry Summer around here. Strawberries, Blueberries, Raspberries and Blackberries galore. Today's Smoothie recipe is brought to you by the Berry Black - Blackberry that is. A nice sweet, slightly tart tribute to this lovely berry - simple and sweet. Enough buttering up the berries - here are the deets on the Blackberry smoothie.


    The Deets
    2 Cups Blackberries1 Banana
    1 Cup Spinach
    1 Cup Plain Lowfat Yogurt
    1/4 Cup Milk
    1 TBS Creamed Honey


    The How To
    Add Milk and Yogurt to Blender
    Next Add Spinach
    Then Pile in the Berries, Banana & Honey
    Blend & Enjoy!


    Sunday, July 29, 2012

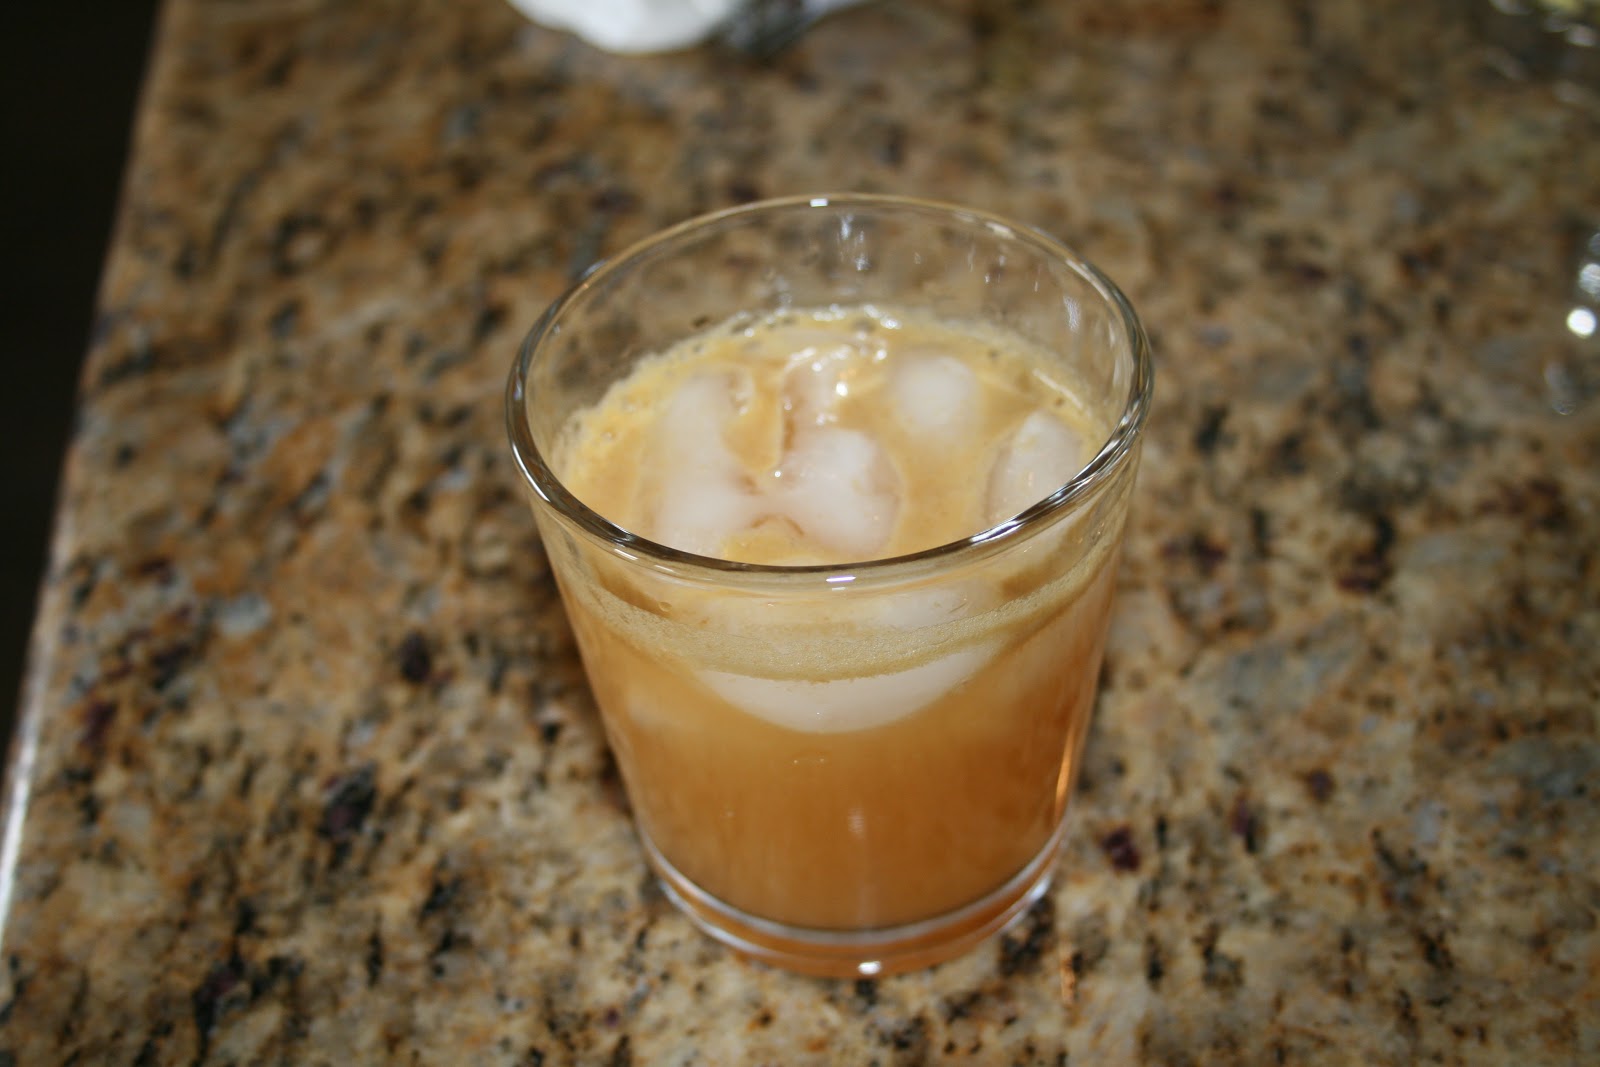
    Golden Beet Watermelon Carrot Juice

    Summer is a great time to experiment with juice recipes. Produce is abundant and inexpensive. This time of year, I am far more adventurous with my juice creations. Today's juice creation celebrates one of my favorite summer fruits - the watermelon! As we all know the watermelon is one sweet fruit, so to tone it down I added a grapefruit. The result was as delicious as it was healthy. Here are the deets to create this yummy juice blend.

    2 Cups Watermelon
    1 Cup Carrots
    1 Golden Beet
    1 Grapefruit

    Clean, Cut, Juice & Enjoy!


    Sunday, July 22, 2012

    Asparagus Couscous and MahiMahi

    Summer is in full swing, it's hot, too hot. I don't know about you, but when it's too hot, food is the last thing on my mind. But we've all got to eat, so I tend to chose lighter meals in the summer. There is plenty of fresh produce to go around, all you need now is a light protein and a quick and easy side. I'm a big fan of couscous, it's quick, easy and doesn't over heat the house during the summer thanks to its quick cooking time. Today's recipe is a simple Israeli Couscous with grilled MahiMahi.

    The Deets
    1 Box Israeli Couscous
    8-10 Stalks of Asparagus
    8-10 Mushrooms (I used baby portabellas)
    1 Shallot
    2 TBS Butter
    2 Cups Chicken Broth
    1/4 Cup Almonds finely chopped

    The How To
    Bring Chicken Broth to a Boil
    Add Couscous and lower heat to medium-low
    Cook approximately 15 minutes {until liquid is evaporated and texture is right}
    Cut Asparagus and Mushrooms into bite size pieces
    Finely Chop Shallot
    In a small pan melt Butter over Medium
    Add Shallot and cook until transparent
    Add Asparagus and Mushrooms cook until glossy
    Once Couscous is fully cooked pour it into pan with Asparagus, Mushrooms & Shallots
    Mix Well and add Almonds
    Add a lean protein - I made it with grilled MahiMahi
    Plate, Pray & Enjoy

    Saturday, April 21, 2012

    Noosa. Best Yogurt Ever.

    Awhile back my friend had posted a status update about being in love with Noosa. Since I knew she hadn't been to Australia in recent times (or ever for that matter), I inquired as to whether she was planning a trip or discussing something else entirely. She then told me about Noosa Australian Yoghurt, her latest obsession. Being the food-loving, attempt to be healthy girl, I am I had to try it. Let me say this: My name is Tiffany and I am a Noosa Addict.
    Seriously. The stuff is amazing! If you haven't tried Australian style yogurt - you should - but stick with Noosa. I had tried other "Aussie yogurt" and lets just say it didn't go well. Noosa however totally hits the spot for perfection in yogurt! The consistency is between traditional American style yogurt and Greek yogurt. It is sweetened with honey and is all natural. My personal favorites are raspberry, blueberry and strawberry-rhubarb. They are amazing!

    FYI this post is not in any way shape or form a sponsered post - it is purely an "I love this product & you should too" post!

    Saturday, April 07, 2012

    Acai Berry, Berry, Spinach Smoothie

    I Love a good Smoothie! I recently discovered these great pure Acai berry packets in the freezer section & they make smoothies even more healthy & delicious. Here are the deets on the Acai Berry Berry Smoothie:
    The Deets
    1 Acai Berry Packet
    1 Banana
    1 Cup Blueberries
    1 Cup Spinach
    1 Cup Plain Lowfat Yogurt
    1/4 Cup Milk
    1 TBS Creamed Honey
    The How To
    Add Milk and Yogurt to Blender
    Next Add Spinach
    Then Pile in the Berries, Banana & Honey
    Add Acai Berry Packet
    Blend & Enjoy!

    Sunday, March 25, 2012

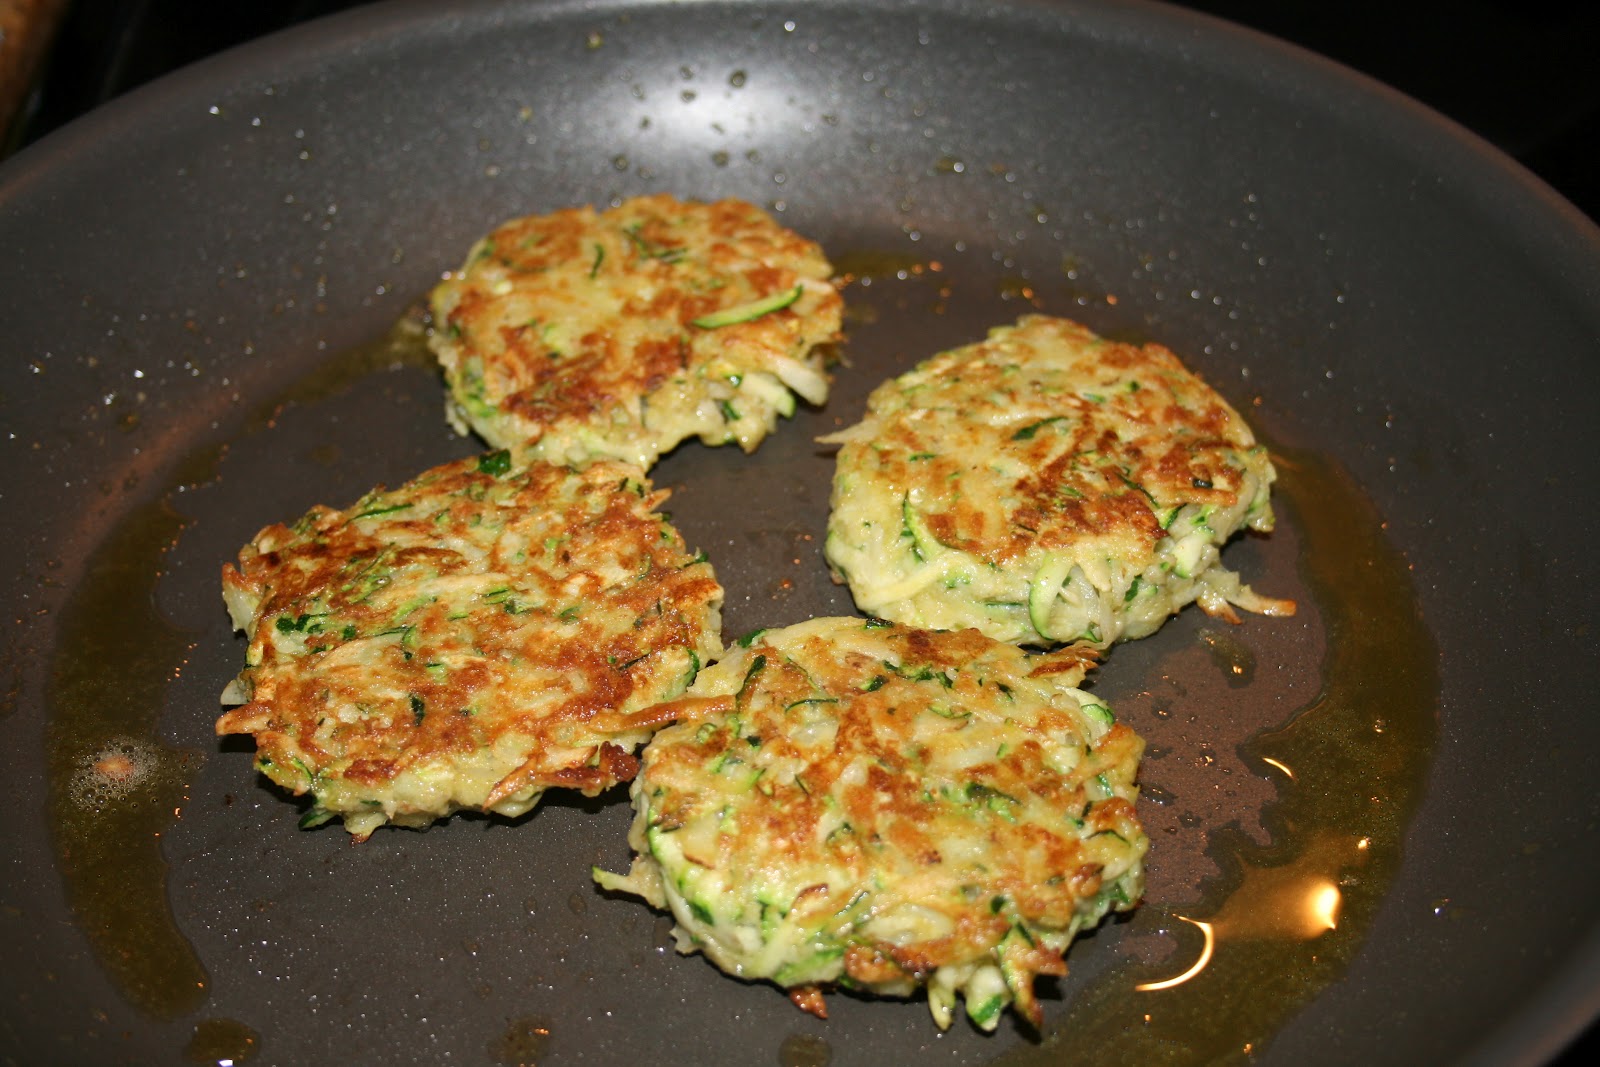
    Zucchini Fritters

    Spring is in the air, fresh veggies are becoming more abundant (and will be even more abundant once my freshly planted garden takes off!) And in general I'm craving fresher meals packed full of as many veggies as I can get. This week I bought a bunch of beautiful baby zucchini. After stir-frying, sauteing, and grilling, I decided to try something different. For some reason I was craving my dad's delicious and utterly unhealthy hashbrowns...so I thought to myself, "self, you can do something healthier to hit the spot, right?" and I set off to make zucchini/potato fritters. 
    I added the potato because I wasn't sure how the zucchini would hold up both in the flavor and texture department. They turned out fantastic and I really enjoyed the little nuttiness the potato added, but they would be good straight zuch as well.  Here are the deets for a new spin on zucchini. 


    The Deets
    2 Zucchini Shredded
    1 Potato Shredded
    2 Eggs Beaten
    1/2 Cup Panko Breadcrumbs
    1 Shallot finely chopped
    Salt and Pepper to taste
    1 TBS Olive Oil

    The How To
    Add Beaten Eggs into Shredded Zucchini, Potato and Shallot
    Mix until coated well with egg
    Add Panko Breadcrumbs and Salt and Pepper
    Once fully incorporated form into small patties
    Add Olive Oil to a pan over medium heat
    Cook patties until brown {about 7 minutes}
    Flip-over and cook on other side for another 7 minutes or so
    Plate, Pray & Enjoy